Hey guys, here’s my update routine on how I style my hair when it is growing out.
Check out the video and post below on how for the full details.
I feel like since coronavirus started and the world has been in and out of lockdowns, it has made a lot more people less reluctant to run down to the barber for a quick touch up. So I don’t think I’m the only now thinking there is no better time to try growing out your hair. Especially when hardly anyone will see it during the awkward stage.
So yeah, I’m in the process of growing out my hair a bit and just wanted to share one of my favorite styling routines for my hair.
Products Used (with links to Amazon):
- TRESemmé Care and Protect Heat Protectant – https://amzn.to/3fpsfVc
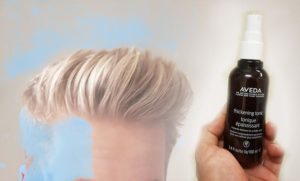
- Aveda Thickening Tonic – https://amzn.to/37cn71V
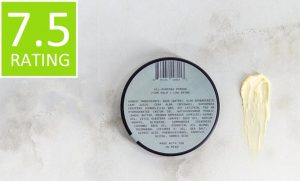
- Firsthand Supply’s All Purpose Pomade – https://amzn.to/3pNy9Ex
Step 1: Wash your hair
Working with clean hair helps to boost to the finished appearance of your hairstyle.
As your hair gets longer and starts to move around more, you might begin to find that it gets greasier a lot faster. All the additional movement and touching required just to make your hair get dirtier faster. Especially when you use hair styling products since it typically will take more products to tame the mane. But that’s ok because we can just wash our hair.
And I can already hear you saying, but WAIT, it’s not good to wash your hair every day, etc, etc.
This is true in some cases, but it’s not a golden rule that is simply black and white. If you zoom in to look at the reasons why you’ll also see that just being sensible about hair washing is all you need to do. Once your hair gets dirty and greasy, it’s ok to wash it.
For some people some of the time, it takes a few days to get dirty, some less than a day. But that really depends on your lifestyle. I mean if you’ve got a ton of product in you’re hair and your hair is all dirty, that’s also not good for the health of your scalp, and washing your hair can actually be a good thing. If your hair is dirty then the shampoo is going to remove the excess product and oils before it even gets to the hair follicle. You may have noticed that sometimes 1 wash isn’t enough to completely clean your hair. So it’s not always stripping your hair of all oils and nutrients. Not all shampoos are 100% effective at removing all oils, not all shampoos are damaging, sometimes the way you use it matters more than how often.
Which brings me to my next point. If your hair is clean and looking fresh, then yes sure skip the wash, it probably doesn’t need it. But if your hair is starting to get a bit greasy, then just give it a light wash. There are different strengths of shampoos, so in this case, you could use a gentle cleansing shampoo (or just a bit less of your regular one) to freshen up your hair and reduce some of the excess oils. I often use this strategy to avoid overfishing, I just use less and water it down to give a more gentle wash. And then once or twice a wash I do a full wash to remove build up the lighter washes couldn’t.
Step 2: Towel Dry your hair
I always find the be hairstyling canvas is clean towel-dried hair. Mostly because it gives me more consistent and reliable results when applied products.
Don’t get me wrong, I love a bit of second-day hair and dry shampoo or texture powder, but sometimes results can be more inconsistent.
Step 3: Apply a heat protectant
Applying a heat protectant to your hair helps to coat the hair preventing it from some of the damage that can be caused by the heat during the styling phase.
While there are lots of options out there, and more products you apply will give you some form of heat protection. Simply because they are coating your hair and providing a bit of protective barrier. I find TRESemmé’s basic heat protection spray to do the job well. It is affordable and widely available and does the job.
I have tried lots of different products over the years, and also times with no products. I can feel the difference in hair health when I use a heat protectant. Tresume has a good affordable heat protectant that does the job well without making the hair greasy. Check out the TRESemmé Protecting Heat Spray on Amazon
Step 4: Apply your pre-stylers
What is a pre-styler you ask?
A pre-styler is a hair product that you apply before styling, typically in damp hair before using a hairdryer. There are all kinds of different options available, but they can help to boost the natural styling capabilities of your hair or allow you to style it in different ways.
For example, I have fine and limp hair, so I like to use a pre-styler like Aveda Thickening Tonic or Label.m Thickening Tonic to hair add thickness and more structure to my hair which helps me to add volume and hold. But like I said, there are many different types and a pre-styler out there for everyone. Other common uses for pre-stylers to reduce frizzy or smooth your hair before style. You just have to find a product that works for you.
Currently, my go-to main pre-styler is Aveda Thickening Tonic, it helps to make my hair look fuller and reduces shine. If you want to read more about it, I written a full post about it here.
Aveda Thickening Tonic
Read my review | View on Amazon: https://amzn.to/37cn71V
Step 5: Apply a primary styling product that works in damp hair
For my longer hair, I also like to apply my main styling product to damp hair before blowdrying. It allows me to use a bit more product while still leaving a more natural finish after I have finished blow-drying. Currently, one of my main stylers is Firsthand Supply’s All Purpose Pomade (check out my review by clicking here or find it on Amazon here). Although it typically has more shine than products I would normally use, it adds good structure and lasting hold to the hair, and the Aveda thickening tonic helps to reduce the shine to a natural-looking finish.
Firsthand Supply’s All Purpose Pomade
Read my review | View on Amazon: https://amzn.to/3pNy9Ex
Step 6: Blow dry your hair
Take a brush and set your hairdryer to full speed on medium heat. Start by drying the back and sides. This helps to keep them out of the way, making it easier to style and share the hair on the top of your head.
Next, start drying the top by directing it with a brush from side to side (both ways), then front to back, then back to front. Then repeat until completely dry.
This technique helps to improve the styling control of your hair and overcome awkward cowlicks. I like using it for longer hair, because when your whatever direction the hair falls it can be worked into a nice style. So even when it’s falling apart, it’s still falling into place.
Step 7: Shape into the desired style
Once your hair is dry, simply push your hair back and let it naturally fall into a nice relaxed style. Apply a bit more product if you want to lock it in a bit. But in my case, my preference was to leave it.
Next: Enjoy your day with easily reworkable hair throughout the day.
Thanks for reading and see you next time.

